If you are just getting into Kayak Fishing and are overwhelmed at the high cost of equipment, have no fear. It doesn’t have to be as expensive as you might think. I’ll show you how to convert any kayak into a fishing kayak.
- Purchase a cheap kayak
- Install a milk crate with rod holders as storage
- Mount rod holders
- Have an anchor
- Purchase a Drift Sock
- Paddle Holder and Leash
- You need a Fishing Net
- Make it fun with the right Personal Gear
Let’s dive deeper into each one of these items and get your Kayak ready for fishing for very little money.
1. Purchase a Cheap Kayak
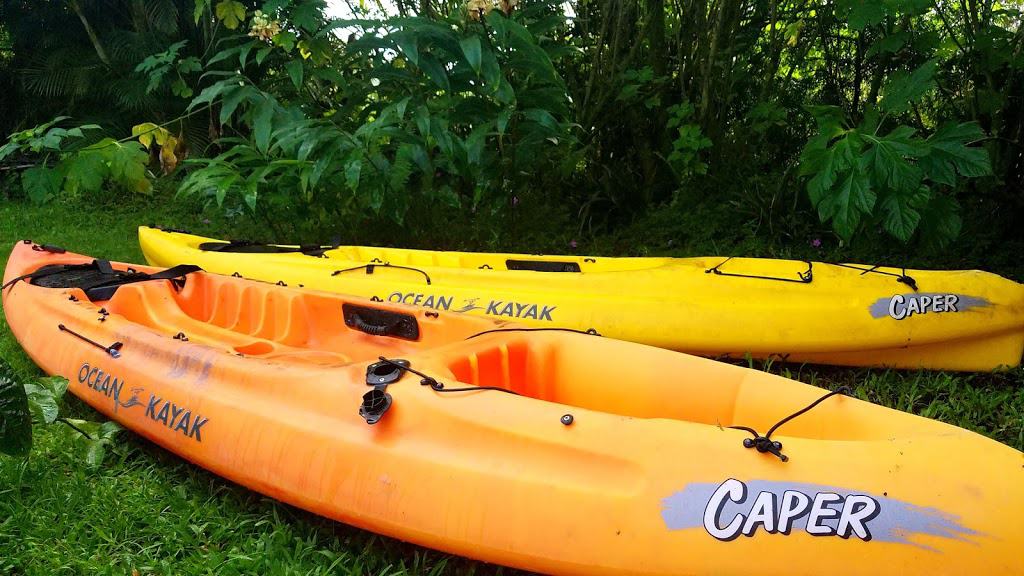
You can’t go Kayak Fishing without a Kayak, but it doesn’t have to break the bank. There are many ways to turn any kayak, whether sit in or sit on top, into a fishing kayak. So if you are on a budget, the best way to break into Kayak fishing would to purchase a basic kayak and customize it for kayak fishing.
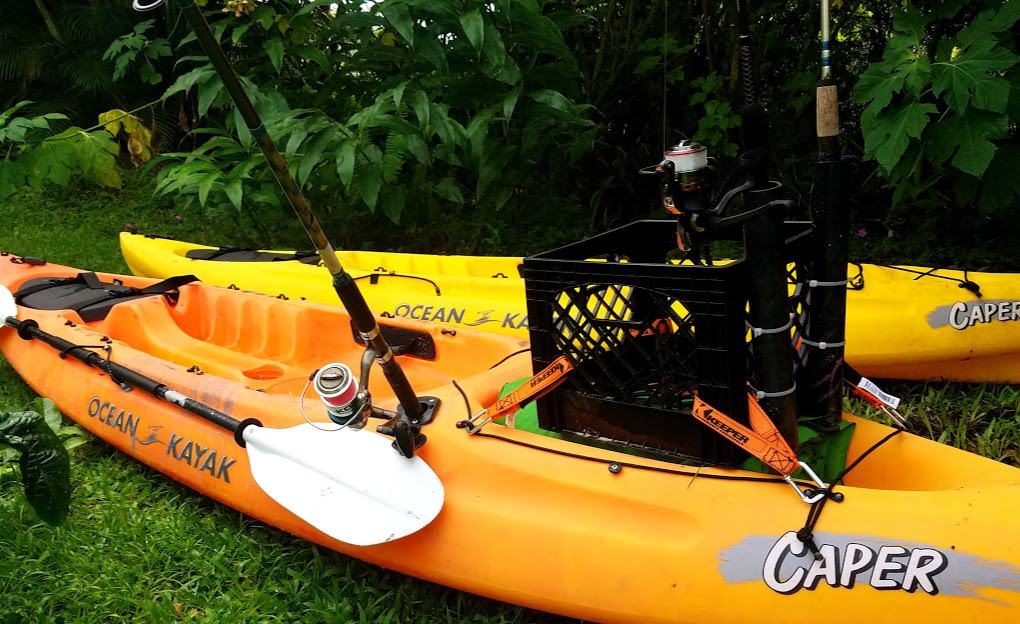
When I got my Kayak, I was constantly checking craigslist and FB marketplace for used kayaks. It took some time, but finally, I was able to find a deal. Two sit on top “Ocean Kayaks” for $250 each, complete with paddles and seats. The great thing about buying used is that you can negotiate. I got both for $400! I live in Hawai’i, mind you, where nothing is that cheap!
There is a great site to buy a kayak online with prices starting at $200! Check out Academy.com, you can convert any of their boats into a fishing kayak.
This is the time that you would be getting a paddle and seat for your kayak. If you’re on a budget, just get the cheapest thing you could find. My seat came with the used kayak I bought, another great reason to buy used, but it’s not the most comfortable after being in the water for hours.
I have seen custom kayaks where folks installed a boat seat into their kayak. If you can do that, then you would be resting your okole on the cadillac of kayak seats. You can still find good seats that will give you hours of comfort, just make sure they’re padded. Your body will thank you.
As for paddles, I recommend spending $20 extra bucks and get a lightweight paddle over the cheaper aluminum ones. When paddling long distances and fishing many hours, your body gets tired. Eventually that paddle begins to feel like a weight.
Cost: $200-$4000
2. Install a Milk Crate with Fishing Pole Holders
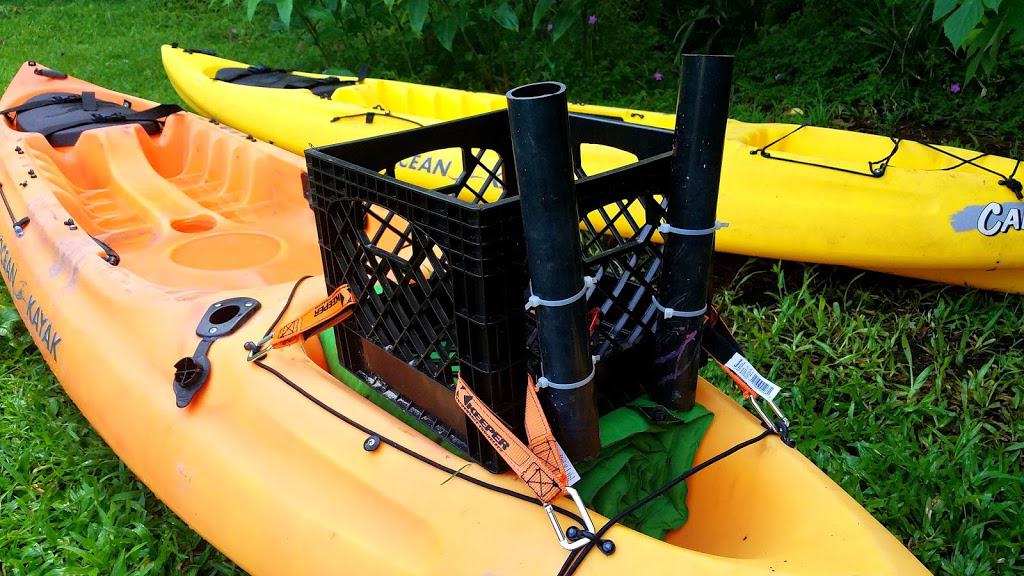
One of the most important things to consider when setting up your kayak to be a fishing kayak is space. It is essential to be well organized with how you stow your gear. The simple milk crate is a fantastic way to make it easy. Check out our post on Building the Ultimate Kayak Fishing Crate.
I picked up a Milk Crate from Home Depot for $8. You can also purchase one already installed with rod holders for $30 from Amazon. If you already have a milk crate lying around the house, even better.
To install rod holders onto your milk crate, all you need is a length of 1.5” PVC pipe cut to the length of your rod handle, then zip tied directly onto the Milk Crate. It’s that easy.
The Milk crate is attached to the kayak in the rear well just behind the seat. It’s best to put a couple foam pads beneath the milk crate to raise its level a bit and to have a sturdier foundation. Then secure the milk crate with bungee cords to the kayak and your all set.
I also like to have a bungee net to go over the top of the crate for added assurance that nothing is going to fall out too easily if my kayak tips over.
I like to organize my lures and gear into plastic storage boxes and put them into the milk crate for easy access. I have a box for lures, swivels and weights, one with extra line and a reel, one for tools like plyers, measuring tape and fish grips and a box for first aid and other safety gear. But you can customize that however you like.
A great hack I saw online was a knife holder installed on the side of the milk crate where you can store your favorite knife for easy access. On the bottom of the milk crate you can attach a cutting board with zipties. Just flip the milk crate upside down when on land and you have a handy dandy cutting station.
Cost: $10-$30
3. Mount Rod Holders
Placing your rod holders on your kayak can be tricky. You want to make sure that they won’t interfere with your paddling, but you also want them to be accessible.
I like to install the flush mount rod holder just behind me on the left and right side of the kayak and a deck mounted rod holder in front of me. One of the rear rod holders act as my passive rod, usually trolling while I am paddling to my favorite fishing spot. The other rod holder can hold my net or anchor. The front, deck mounted rod holder is more readily accessible for me to use for some light casts or some deep water fishing.
Step By Step: Install Rod Holders
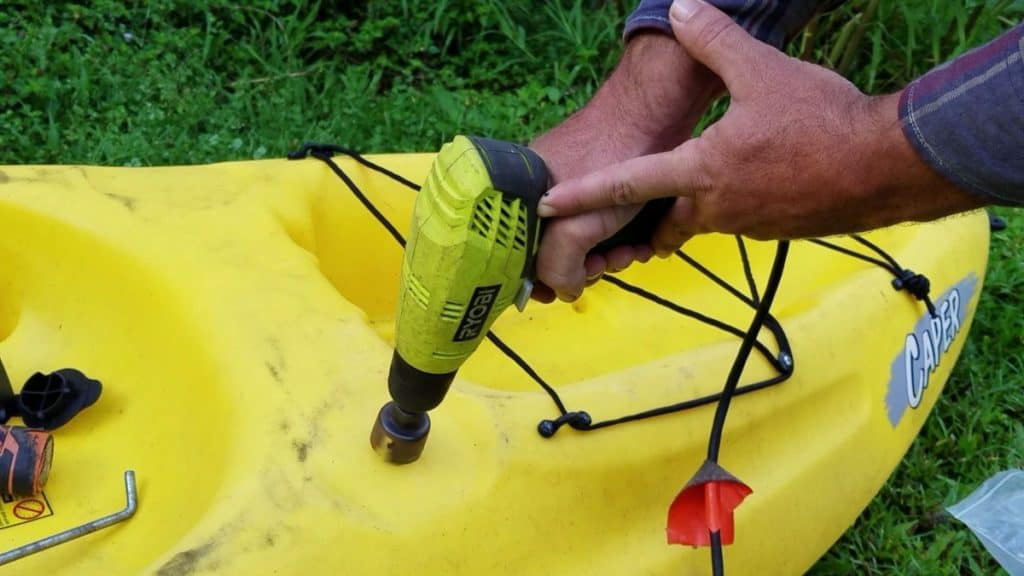
To install a flush mounted rod holder, start by marking the center point of your hole.
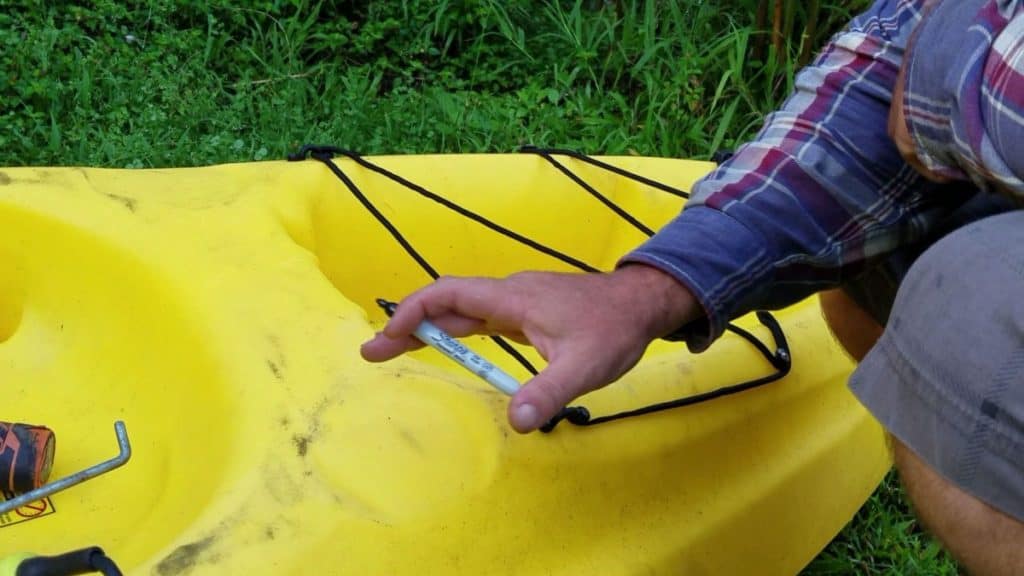
With a 1-5/8″ hole saw, drill a hole for your rod holder to fit into. If the hole needs to be made a little bigger, you can use a razor blade to shave the hole wider. Better to have a hole too small than too big.
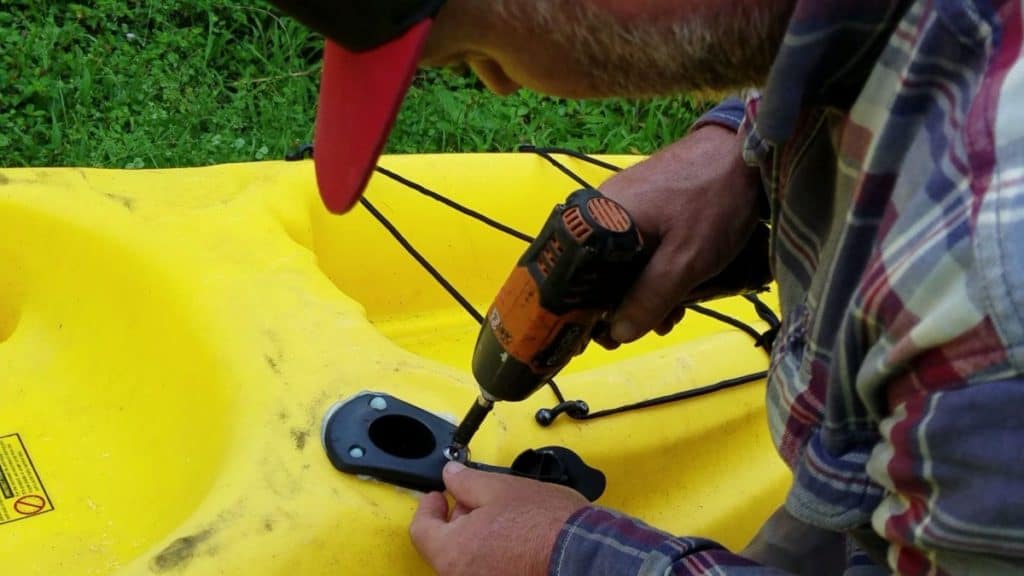
Once the hole is done, apply silicone to the gasket of the flush mount rod holder, insert it into the hole and secure it in place with three Phillips head screws that were provided.
Rod Holder Installation Video
You can purchase a 2 pack of flush mount rod holders from Amazon for $10 and a deck mounted rod holder for as little as $20. I like to make sure the deck mounted rod holder is able to detach from its base to make it easier to transport the kayak on the roof racks of my car.
That’s all you really need. The milk crate already has space to hold 2 extra poles for you or a pole and a net. No need really to cram up your kayak with more. It just becomes too cumbersome.
Cost: $30-$50
4. Have an anchor
An anchor is important to keep your kayak in one place while you are fishing. Without it, it is almost impossible to stay in one place. There is a DIY option of making an anchor with a dumbell, but unless you already have supplies needed to make one at home it’s just as cheap to purchase an anchor from amazon.
A 1.5lb-3lb foldable anchor is easily stored in a flush mount rod holder and can be purchased for as little as $10 dollars.
One problem with an anchor is that sometimes the wind will turn you around based on where your anchor is mounted to your kayak. It’s no fun having your line cast out to the north only to have the wind turn your boat completely around so you’re facing south. Luckily, there is a solution, an anchor trolley system.
An anchor trolley system easily allows you to adjust the location of your anchor from the front to the rear of your boat. Don’t let the wind control you. You can pick up an Anchor Trolley kit for as little as $30 on Amazon or check out this DIY video on how to make your own for only $10.
Cost: $20-$40
5. Purchase a Drift Sock
A good breeze can be your friend, acting as a natural trolling motor. But sometimes that wind is moving you too fast. That’s where a drift sock comes in. Dropping a drift sock into the water will slow you down, allowing you to make a few more casts in the area before you are ready to move on.
I recommend you going with a minimum of 21”, the ones made for kayaks are just too small. I got one from Amazon for only $13. It was worth the price.
Cost: $13
6. Paddle Holder and Leash
You know what one of the most thrilling things in fishing is? Hooking a fish. How about one of the biggest bummers? Hooking a fish and then losing your paddle at the same time! It happened to me. Do you go after the fish and risk getting stuck out in the water? Or do you go after your paddle?
A simple paddle leash will solve that problem. No need to worry about losing your paddle anymore. If you get the right one, it’ll also act as a rod leash. You know you don’t want to lose that! Check this one out, sold by Camping and Kayaking.
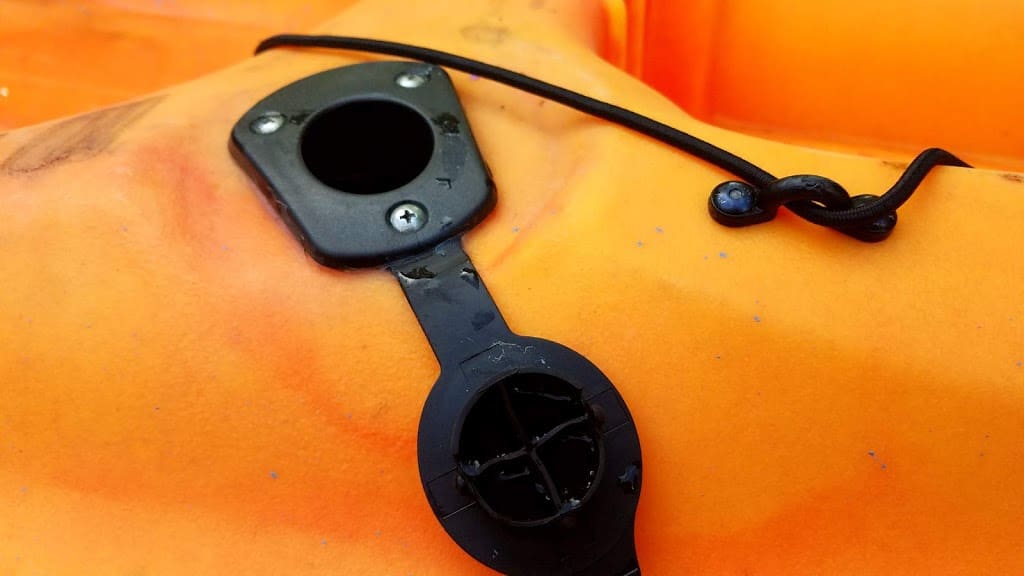
In addition, a paddle holder is a great way to store your paddle on your kayak without it getting in the way while your busy casting your line.
Some Kayaks come equipped with paddle holders, but if yours does not, here’s a great one that doesn’t require drilling any holes into your kayak.
Cost: $20
7. You Need a Fishing Net
Don’t get me wrong, you can get away with fishing without a net. But a net will let you scoop your fish right out of the water as opposed to the risk of losing it hoisting it into your kayak. If the hook is not set well enough, you can easily kiss that catch goodbye.
When choosing a net like this one, you want to make sure you get one with an opening large enough for the fish species you are targeting. For the larger game fish, a 32”x41” net is what I’d recommend. Nets that are 20”x23” would be great for medium size fish.
I recommend getting a net that is made coated nylon and rubber. Its easier on the fish. Especially important if you catch one that you want to throw back. The non-coated nets are harsher on the scales and natural slime coating of the fish.
The mesh size is also important. A good rule of thumb is the larger the spacing between the netting, the larger the fish.
Lastly, since we’re fishing from a kayak, we’re going to want a handle that is around 2’-3’ long, preferably made from fiberglass as opposed to wood because wood tends to rot a bit faster when getting wet. Some nets have telescopic handles which allow for even more flexibility.
Cost: $20
8. Make it Fun with the Right Personal Gear
Your next kayak fishing trip can be made for fun just by bringing along the right stuff. I like to pack a dry bag and soft cooler in my forward hatch filled with drinks and snacks. In the dry bag, I’ll bring along some snacks, mini hammock, lighter, extra clothes, swim gear, microfiber towel, sunscreen and camera. In the cooler I’ll have some nice cold drinks.
With just a couple of items, I have the makings of an all day adventure if I want it to be. I am lucky enough to fish off the coast of the Big Island of Hawai’i. Sometimes I like to take a break at a secluded beach, tie up a hammock, break out some snacks or cook a fresh catch over a small fire, have a cold drink and chill.
I mean, why not?
I can even go out for a snorkel and scan the reef while swimming in warm turquoise waters. I can’t complain.
Only drawback, those forward hatches on kayaks can be a bit cumbersome. They are not necessarily water proof and things tend to get tossed around, leaving you digging deep inside the compartment looking for your things.
A simple hack for that would utilize your dry bag and soft cooler as waterproof containers and attaching a couple velcro strips to the bottom of each, with the matching velcro strips attached inside the hull of your kayak. That way, when you go to store your drybag and cooler inside the hull of your kayak, they stay securely in place by attaching to the velcro inside the hull.
Those are the basics for gearing up any kayak into a fishing kayak. You can do it all for less than $150 too (excluding Kayak).
Bonus
Once you’re up and running, you may begin to think of add ons. Installing an adjustable base by Ram Mounts that can be used interchangeably for a fish finder or camera or even a rod holder would be one of the first things I would think about next. A good fish finder will have a dramatic effect on your fishing and you know you’re going to want to get a record of that catch!
Happy Fishing!!